I’m back today to show you how we installed our planked wall. Once again, please excuse my pre-blogging photos.
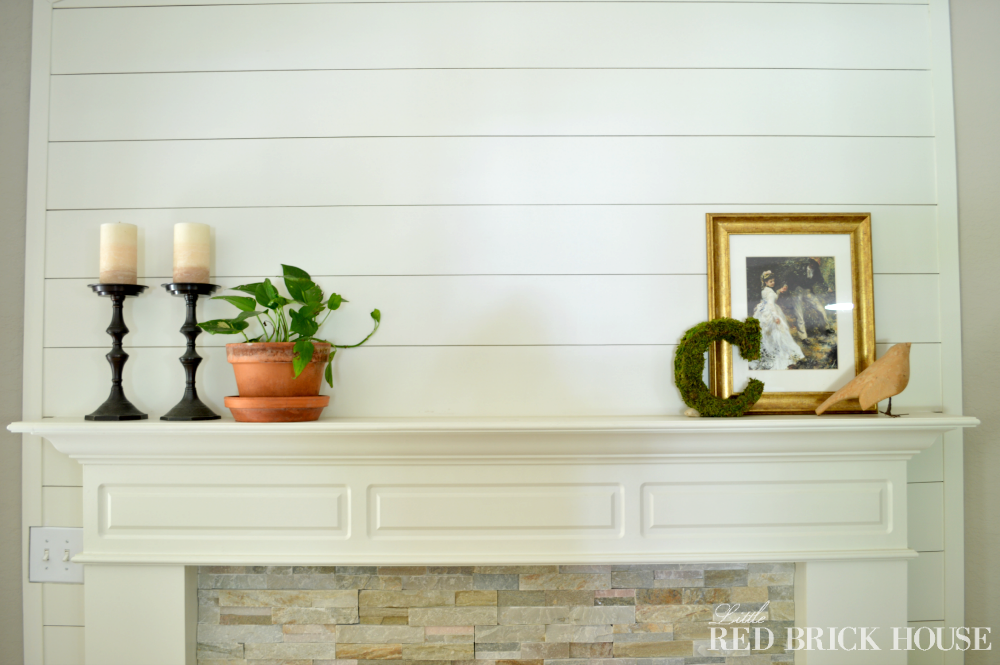
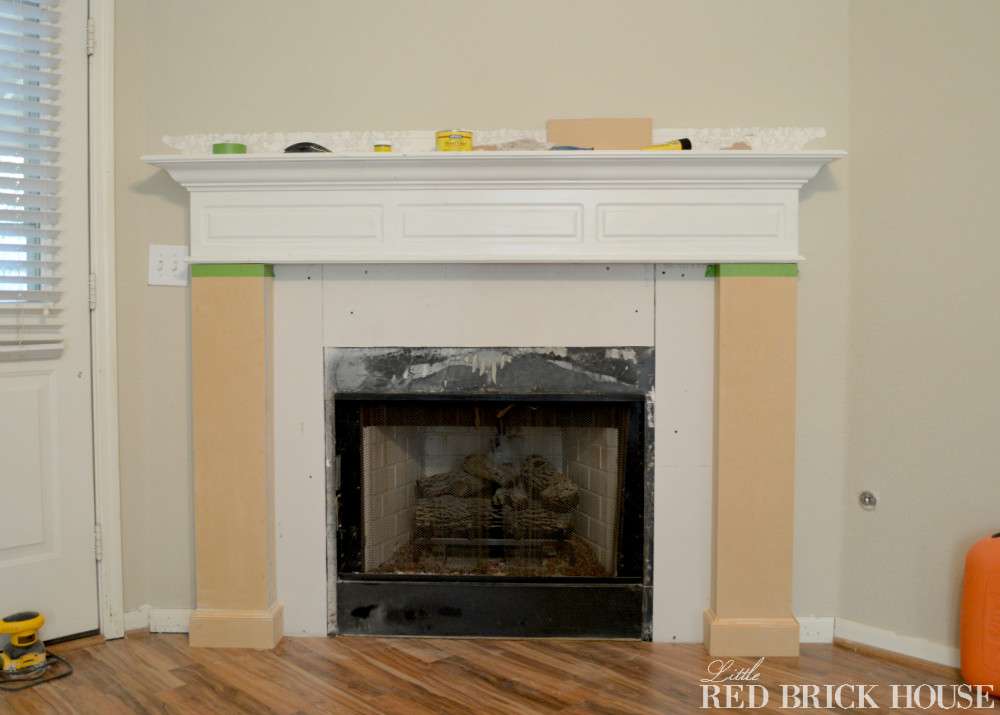
I absolutely love the way planked walls look and I thought, “What better place to feature one than the fireplace wall”. I wanted to make the fireplace the focal point of the living room, so it only felt natural to play up that little corner as much as possible. Here’s what the fireplace looked like when we left off after installing the pillars.
My hubby headed to Lowe’s and grabbed the closest thing to it that he could find. He bought a really thin (1/4″ to be exact) hardwood floor underlayment. It was really bendable and floppy since it was so thin, but that also made it really light. And at about $15 a board, it was cheap. Our fireplace wall is only about 5×9 feet but he bought two boards just to be on the safe side.
Our local Lowe’s will cut just about anything for us, which is nice because we’d rather leave the long, precise cuts to their big saws instead of our wonky circular saw. Six inches looked like a good size for our plank width, so that’s what we went with.
The edges were in pretty rough shape so we sanded those at home. Boy was that fun! Then it was time to install our planks on the wall. We didn’t want to glue everything down because we may want to change things up in the future and glue can cause some gnarly damage to drywall, so we used a nail gun. We made sure to angle our nails downward to help keep the planks from sliding out and off the nail.
To space the boards evenly apart, we used a penny between the last board nailed in and then next one being installed. And to finish off the rough ends, we nailed lattice strips around the perimeter of the wall where it meets the other walls and ceiling.
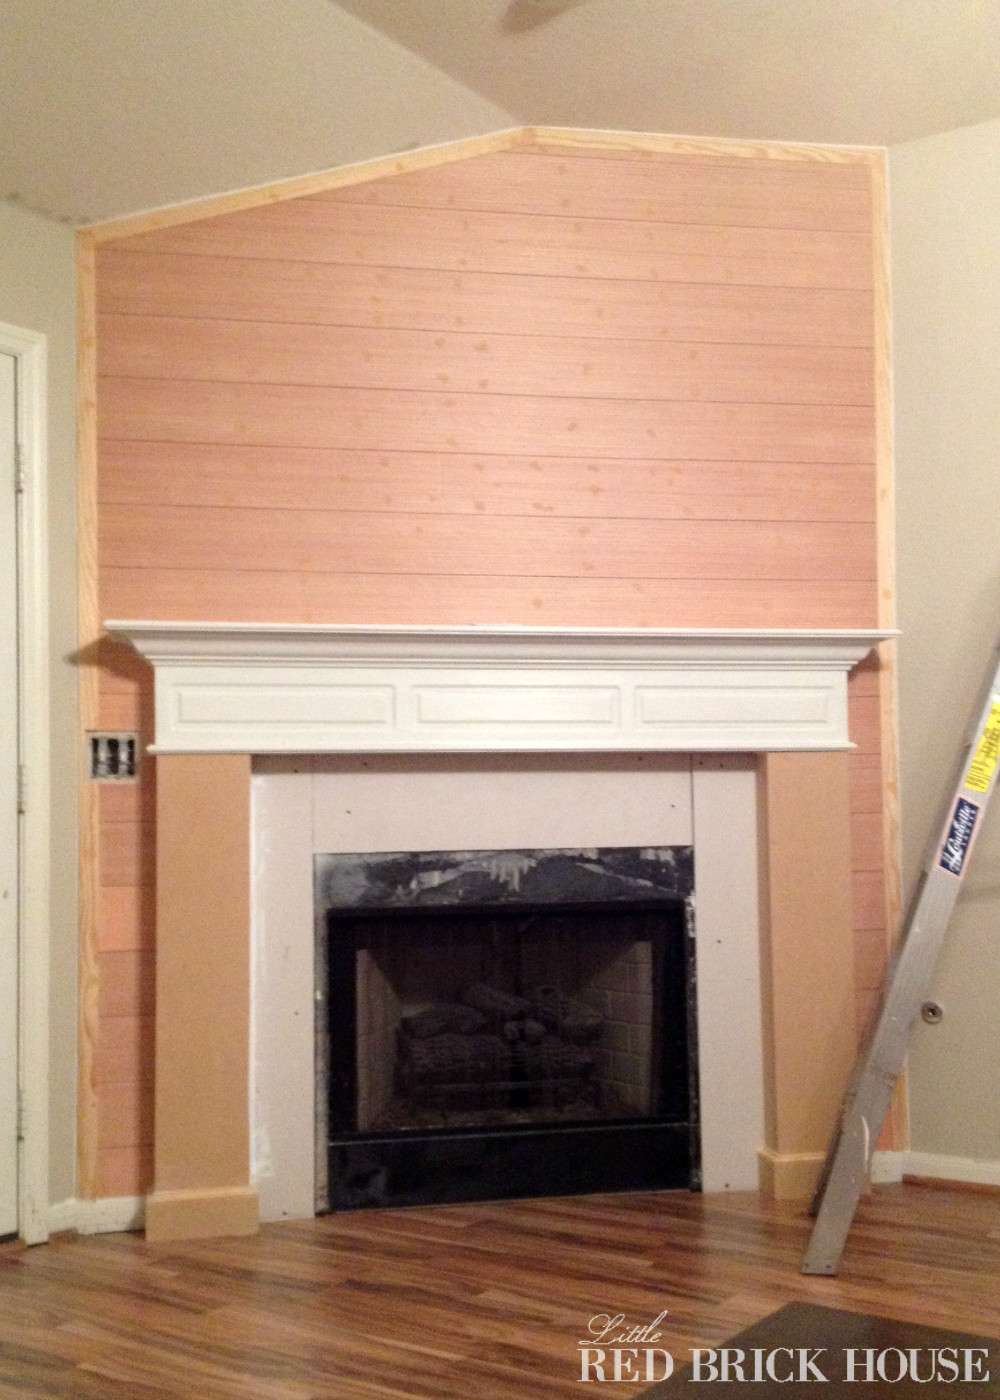
Back while the mantle was removed, I laid it on its side and traced a template of the ends onto some scrap paper. Then, I traced that template onto the boards and used a jigsaw to cut it out. The rest of the smaller pieces were measured and cut to length, as well.
The light switch proved to be a bit of a booger. I know some people use outlet extenders to bring the outlet flush with the wall planks, but the location of the outlet made it interfere with the lattice trim on the side. If I extended the outlet, it either wouldn’t have sat flush with the lattice or the wall plank. Does that make sense? I just left it as-is and I think it looks fine.
Now that the installation of the planks and trim was complete, I moved on to filling the nail holes and caulking the seams. I caulked the seams around where the trim meets the walls/ceiling and around where the planks meet the mantle and pillars, as well as where they met the baseboard. Whew! That’s a lot of caulking.
Everything got two coats of primer and then I applied three coats of Sherwin Williams paint in the color Alabaster. The baseboards in this room also got a fresh coat of Alabaster.

This is my favorite white. It’s a nice and clean, creamy white without pulling too yellow. I am in the process of switching out all of my baseboard paint to this color and I will also use it on the kitchen cabinets, whenever that day comes. Hopefully sooner than later! I’m chomping at the bit to start that project.
Stick around for the final installment, where I show you how we installed the stonework. Thanks for reading along!

Hi Sarah,
I’m in the early stages of redoing our garish brick fireplace, and would love to see your stonework tutorial! I haven’t been able to find it elsewhere on your blog; could you link to it please?
Thanks! Looks lovely!!
Hey Audrey! Thank you so much for stopping by. I still have to post about the stonework. I will definitely make it a priority now that I know that thee’s interest in seeing it. So check back next week! Thanks, again!
I love this, I have come to the conclusion I want a plank wall now. This turned out beautiful!
Thank you so much, Emily! Aren’t plank walls the best?
Love the plank wall! Thanks for sharing with us at Your Designs This Time!
Emily & Erin
Thanks, Erin! And thank you for having me!
Love this! Great job!
Thank you, Tara! And thanks for stopping by!
Love the fireplace! I am busy with a basement remodel and we’re planking the walls, so I especially love seeing a nicely planked wall. 🙂
Thank you, Sarah! Glad I could help. Good luck on your basement remodel. Be sure to let me know when it’s all finished!
Love it!
Thanks, Bethany!
I love this so very very much! The white, the crisp lines, the way it all flows into your fireplace – ah, love.
Thank you so much, Erica! I appreciate it!
LOOOOve your mantel refinish:)Pinning! Visiting from the Blog Hobnob. New social media follows too!
Hi Michelle! Sorry I didn’t reply sooner. For some reason your comment got caught in my spam filter. Hmm. Thank you so much for stopping by and for all of the social media love!
Very impressive! So glad I found your blog today. Found it from the blog hobnob, or something like that! haha. Excited to be following via bloglovin now!! 🙂 and definitely looking forward to more fun posts like this one!
Thank you, Whitney! You are so sweet! And thank you so much for following!
This makes me want to plank ALL THE WALLS. lol I love it. This turned out gorgeous!
Me too! I’m surprised I haven’t done more walls in my house. One day! 😉 Thanks, Stacey!
This looks fantastic! I totally adore it. 🙂
Thank you, Marie!
Virtual fist bump for us both posting about our plank wall in the same day!
LOL! Plank walls for the win!!