Happy Monday, all! I am absolutely astonished that Christmas is in only 3 days! I’m excited yet kind of sad because it feels like this holiday season flew right past. It sort of feels like that happens more and more as the years pass. Whyyyy?
Anyway, I wanted to pop in one last time before the big day and let you know that you won’t be hearing much from me this week. I am going to soak up every Christmasy minute with my family. I did want to share my Christmas Snow Globes with you before I clock out for the week, though. These were so fun to make and I just love the cute and whimsical vibe they give.
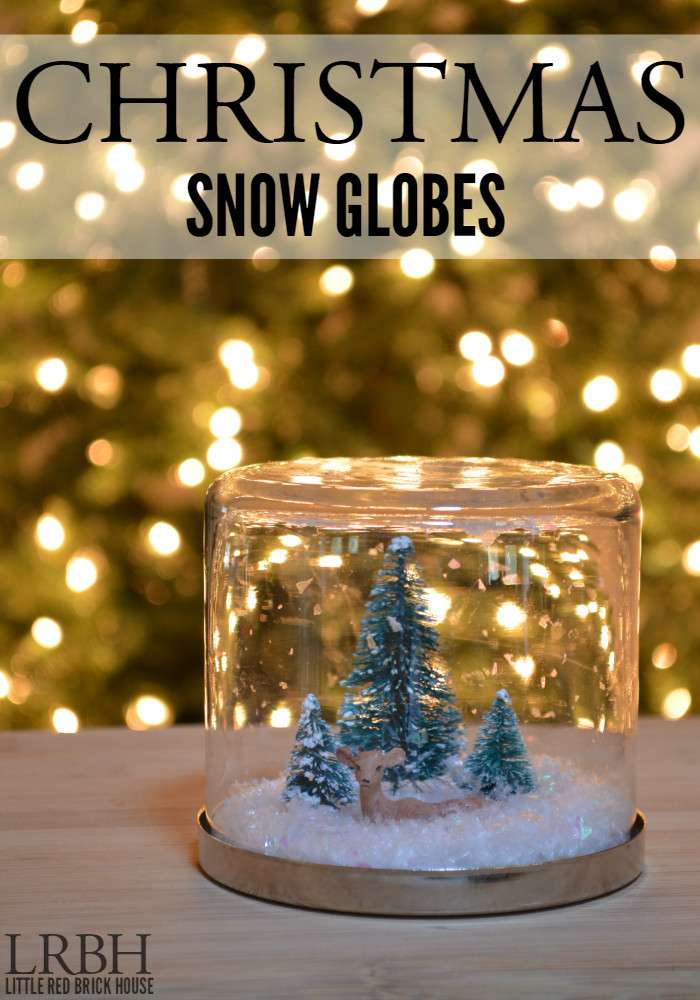
I’ve seen snow globes made from just about everything- mason jars, baby food jars, etc. I wanted to try my hand at making some and I happened to have a few nearly empty Bath & Body Works candles sitting in my cabinet. I thought about making some with water in them but then I remembered that I have an eight year old son and glittery/snowy water inside of glass just didn’t sound like such a great idea. So, I opted for waterless snow globes instead.
Supplies:
- Glass container with lid (candle jar, mason jar, baby food jar, etc.)
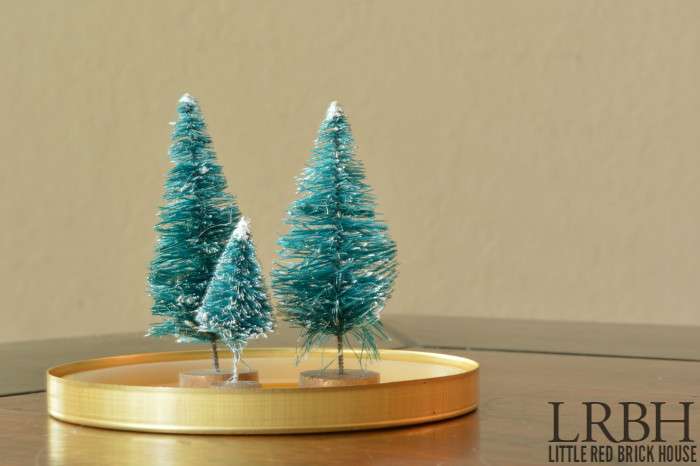
- Bottle brush trees, mini deer figurines or other cute items to decorate with (I found tons of cute ideas at Michaels)
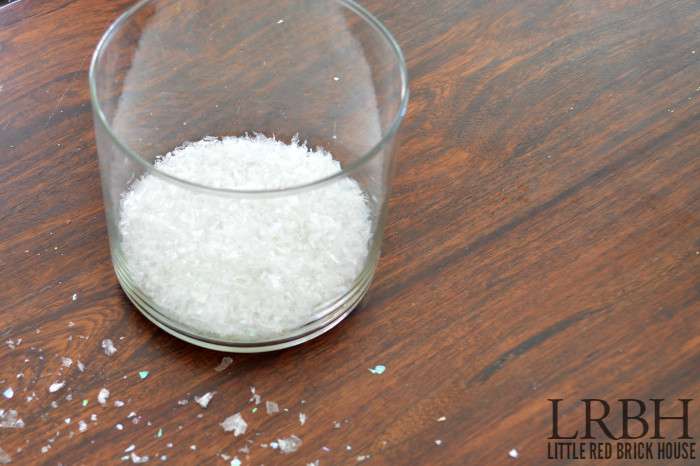
- Faux snow or glitter! (also found at Michaels)
- Waterproof glass glue (I used Loctite GO2 Gel all-purpose glue)
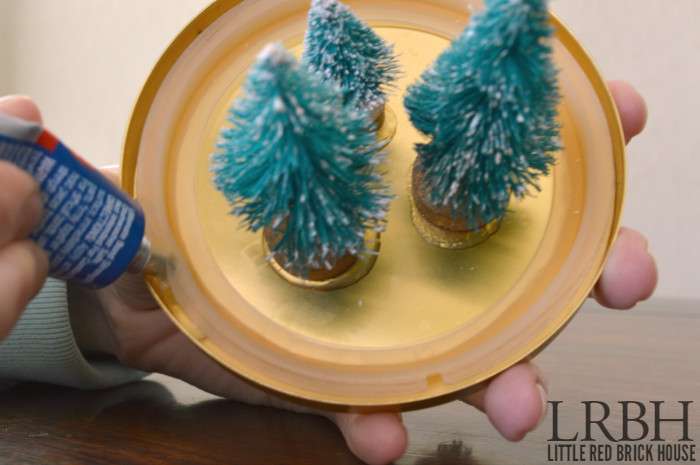
To clean out the remaining wax from the jars, I followed this excellent tutorial from Erica at Dwell Beautiful. Then I glued the bottle brush trees and deer figurine to the underside of the jar lids and let that dry/set for 24 hours.
I filled the jar with enough faux snow to cover the bottom of the jar (about 1/2 an inch).
I opted to glue the lids to the jars so that the snow globes wouldn’t pop open and dust everything with a mini faux blizzard. I stuck the tip of the glue tube between the edge of the lid and the little rubber lip that helps to seal the jar when not in use and gently squeezed a line of glue around the entire rim of the lid.
Then I quickly but carefully popped the lid onto the jar, applied pressure to seal it completely and then flipped it over and shook it a bit to disperse the snow on the bottom. I let that dry for another 24 hours before handling and I was finished!
Aren’t they the cutest?! I like how a bit of the snow sticks to the side of the glass making it look like it is snowing inside.
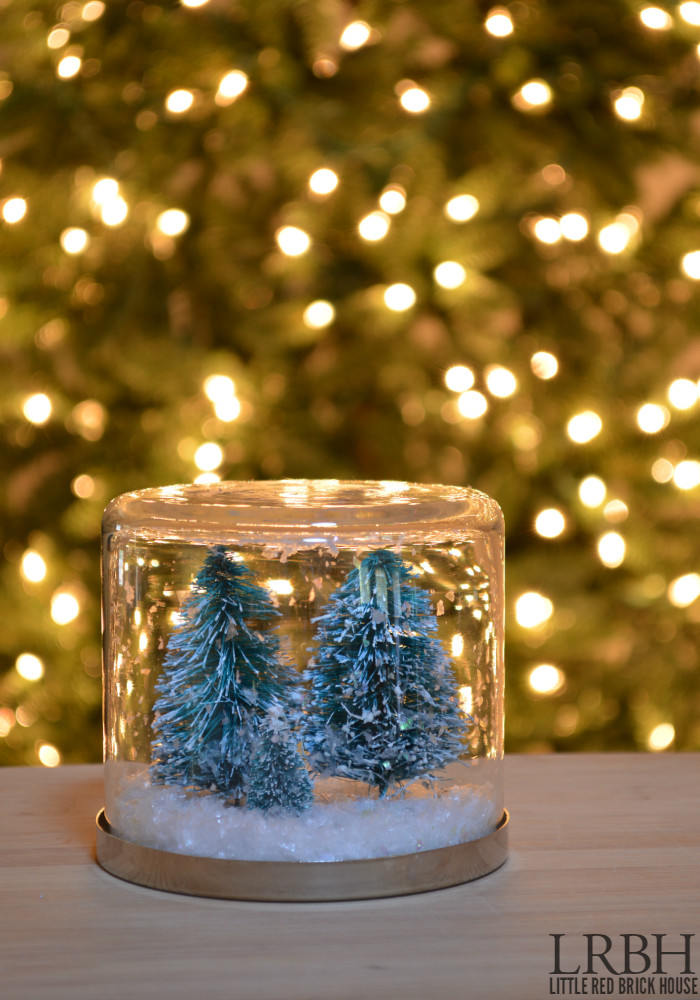
The one with the little deer is my favorite. He looks so cute just chillin’ (pun intended) 🙂 there in the snow.

I hope everyone has a safe and joyous Christmas! Relax, spend time with those who matter and enjoy those few extra slices of pie. Merry Christmas!


SO pretty Sarah! Merry Christmas my friend!
Thank you, Kristi! A very merry Christmas to you, too! 🙂