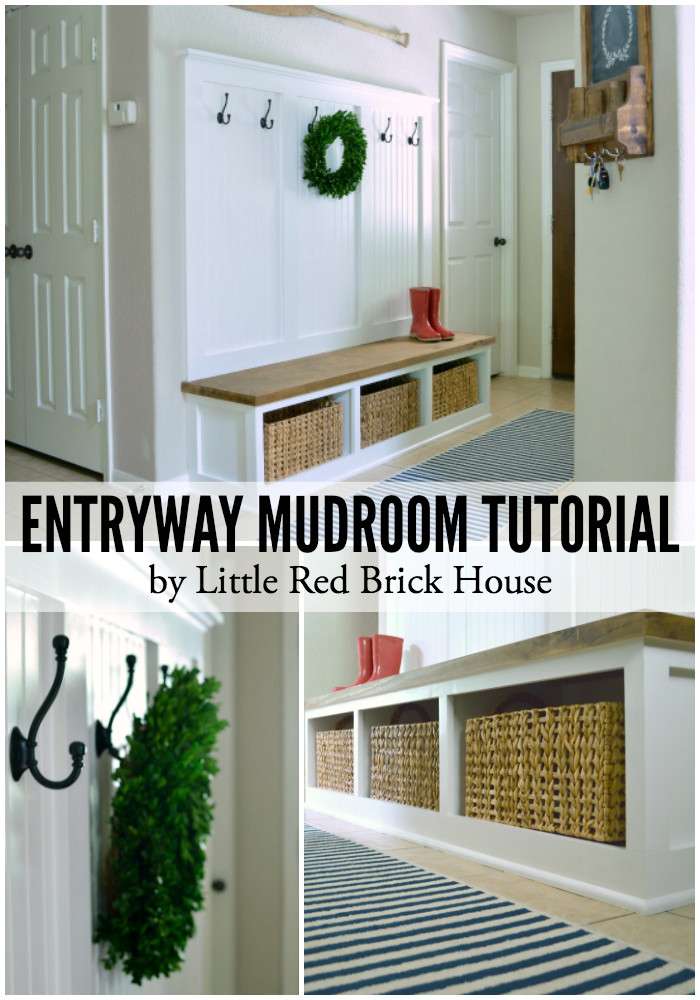
Oh my goodness, you guys. Today is THE day. I am finally sharing my entryway mudroom tutorial! I have had so many requests to share this and I apologize that it’s taken me this long. I temporarily lost the photos that I took of the building process, but after some sleuthing around in the far reaches of my old computer files, I finally found the folder that they were in. #techproblems Anyway, there is A LOT to cover so I am going to go ahead and just get started. I will list sources at the very end, so be sure to check that out!
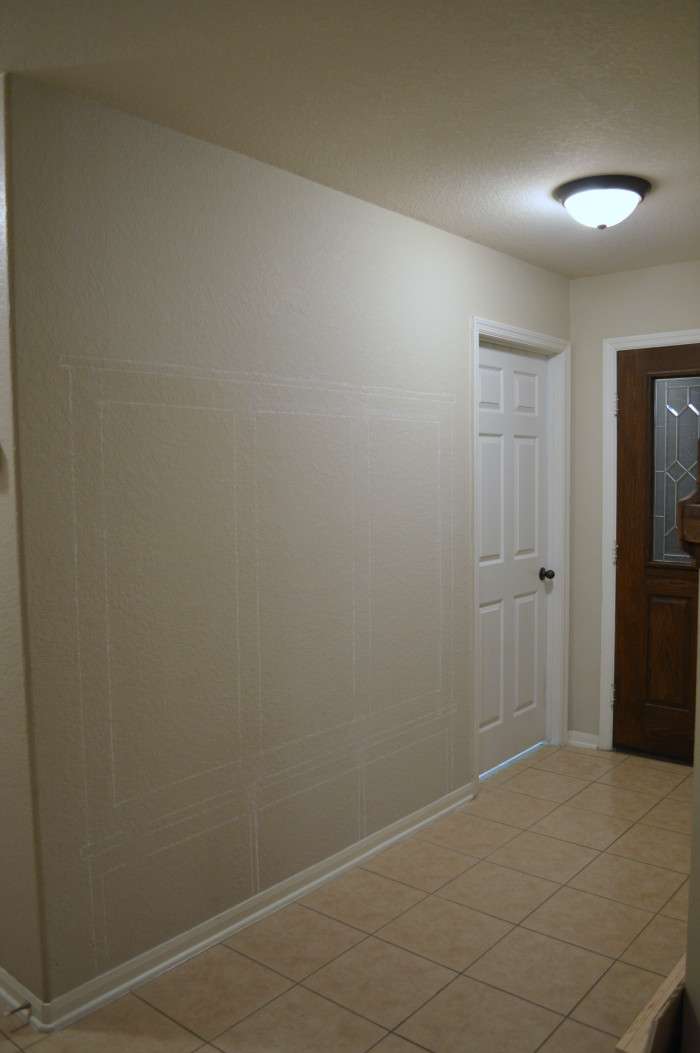
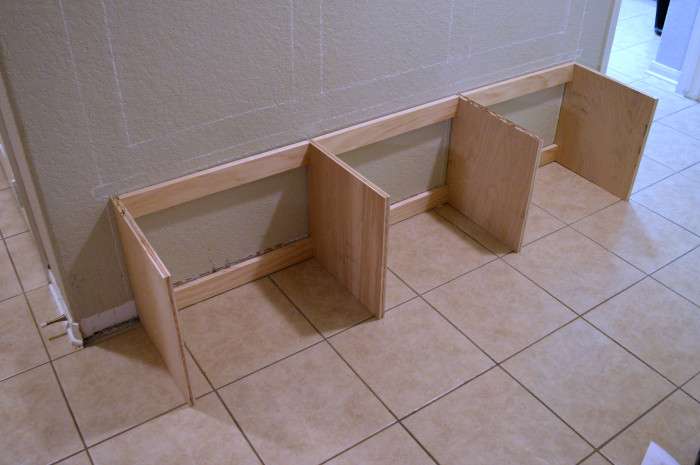
Take a look at the entryway in it’s sad former existence. Like I said in the mudroom reveal, I have been fawning over mudrooms since I first discovered Pinterest four-ish (or more) years ago. I was stuck in an apartment and dreamed about the day I would finally own a home and be able to have my very own mudroom. Well, of course as almost all first time home buying stories go, finances dictated how much home and character we could buy and none of the homes we were considering came with a mudroom. Never fear though! It was nothing my DIY loving heart couldn’t tackle. In the photo below I had traced an outline with chalk for what I was envisioning in my head of what I wanted the space to look like.
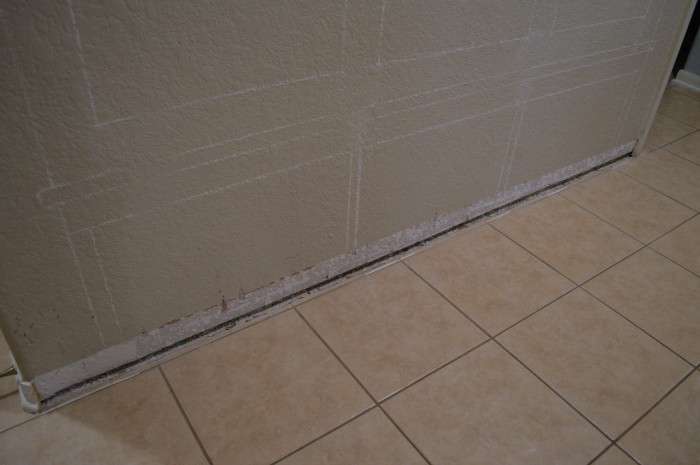
First we ripped off the baseboards so that the bench would sit flush up against the wall once we installed it.
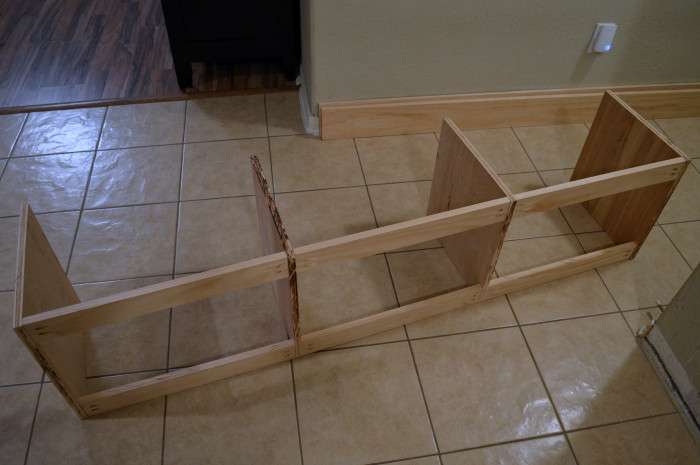
Then we started on building the bench base. We used some leftover 1/2″ thick plywood from the Printmaker’s TV Console for the cubby dividers and some 1×4 boards to connect them together and to act as cleats to nail the bench to the wall. This post contains affiliate links for your convenience. Click here to read my full disclosure policy.
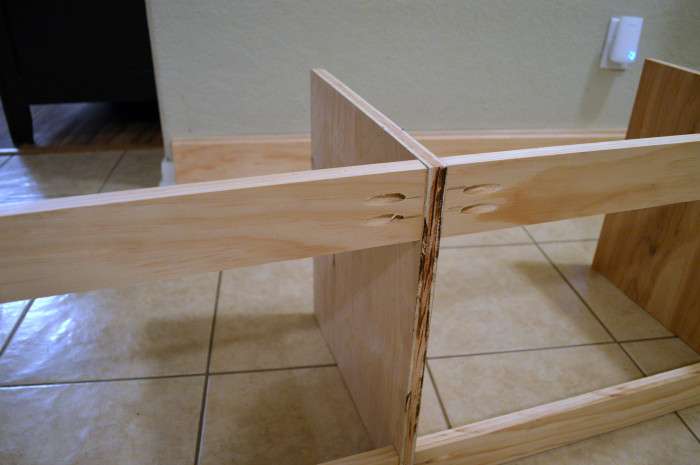
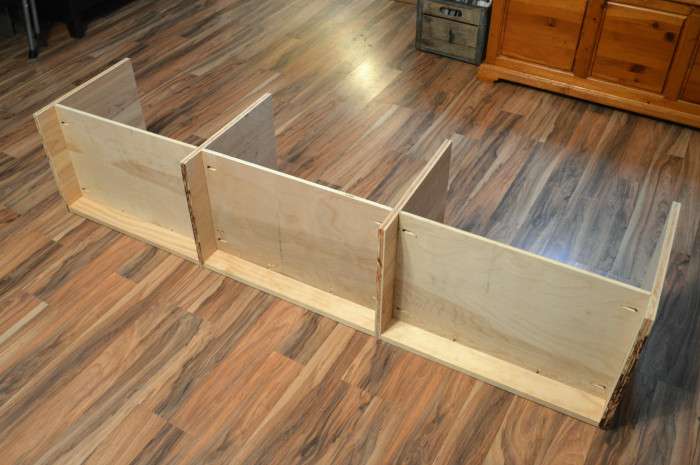
Everything was connected using 1″ pocket hole screws. We made sure to make the holes face towards the wall so that they would be hidden when everything was assembled.
Here’s a look at the base pushed against the wall in place.
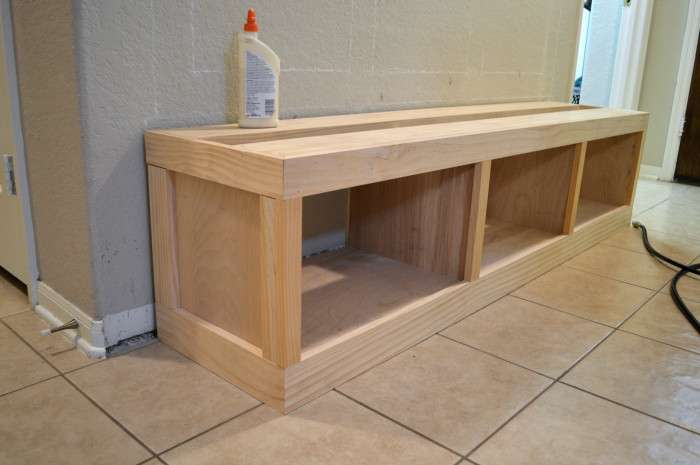
Before attaching the base to the wall we needed to add the shelves that act as the bottoms of the cubbies. They are attached 3 inches up from the ground using pocket hole screws. In the picture below the base is turned on its side with the front facing upwards.
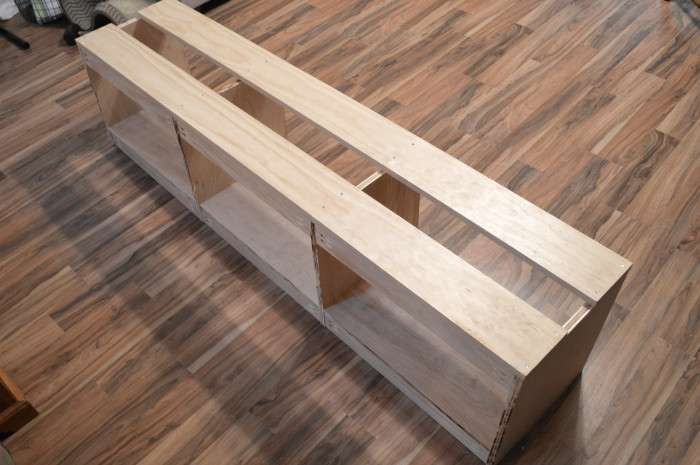
Next we turned the base upright and added support for the bench seat. The supports were made by screwing some spare 1×6 boards into the tops of the cubby dividers. You could use a full sheet of plywood if you want. We just wanted to use up what we had on hand and avoid spending more money. Can you see a theme here?
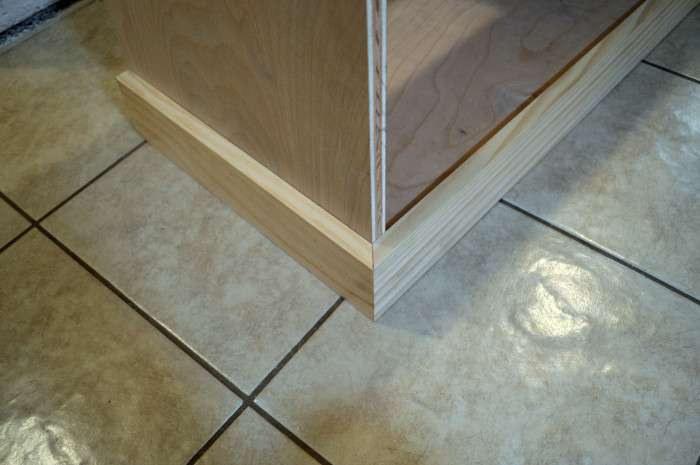
To cover up the open area below the cubby shelf bottoms, we nailed in some base trim in the form of 1×4 boards. I didn’t want to use the same baseboard as what we have around the house but I wanted the height to match, so this worked out well for that.
At this point we realized that we had sort of messed up and wouldn’t be able to secure the bench to the wall with the top and bottom base cleats, since we had just covered up any form of access to the bottom cleat when we nailed on the base trim. #fail We figured that all was ok, though, and that securing it by the top cleat would be sufficient enough to keep the whole thing in place. We were right!
The bench was secured to the studs in the wall using long screws. I think they were 3 or 4 inches long- long enough to go through the cleat, drywall and into the stud. That bench is going nowhere! We tugged and nudged it to see if there was any wiggle and it was solid. Success!
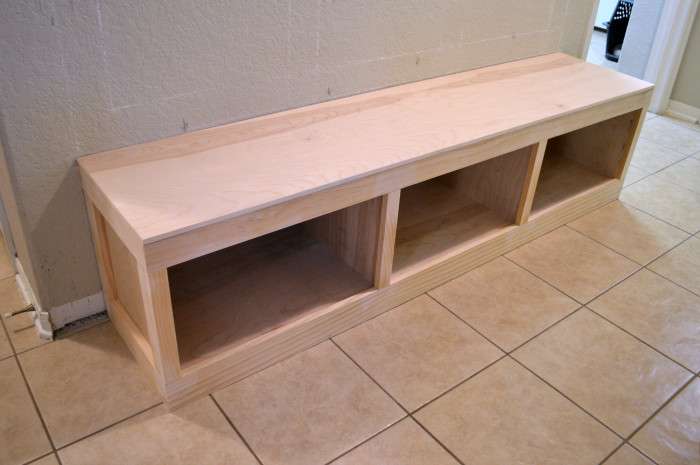
After it was secured to the wall, trim was attached to the sides and front with wood glue and nailed in with a nail gun. The top trim pieces are a 1×3 boards. We trimmed out the front of the dividers with 1x2s. The sides of the bench were a little bit trickier since one side had the side of the front 1×2 to account for. In the picture below you can see that we used a 1×3 for the trim piece next to the wall and then we used a 1×2 for the other side, butted up against the front 1×2. Make sense?
For the bench top, we used a piece of 1/2″ plywood and screwed it in from the underside of the bench seat supports. The plywood was cut flush to the dimensions of the bench base.
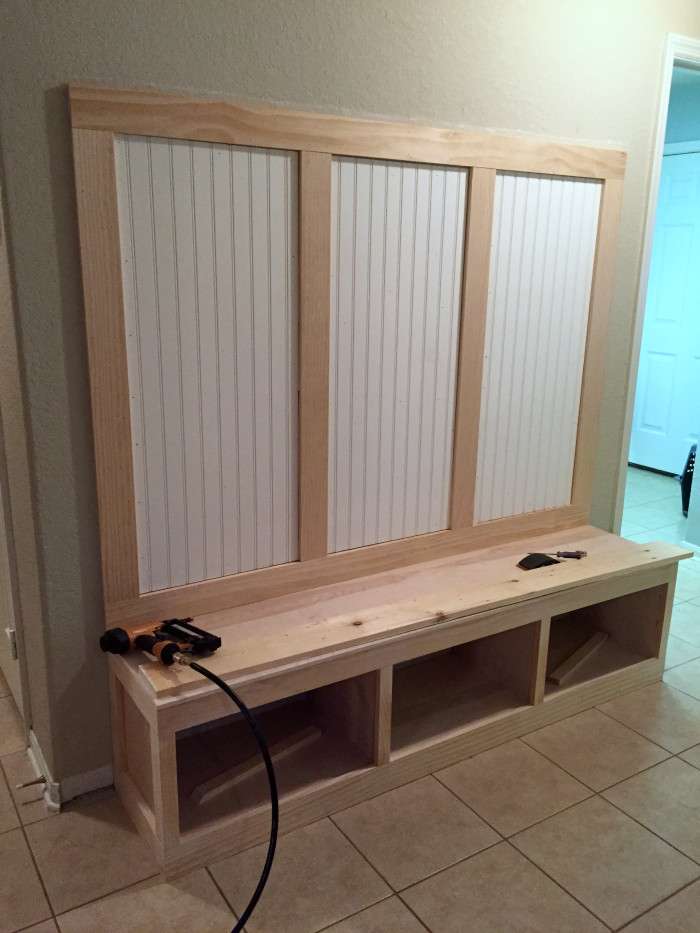
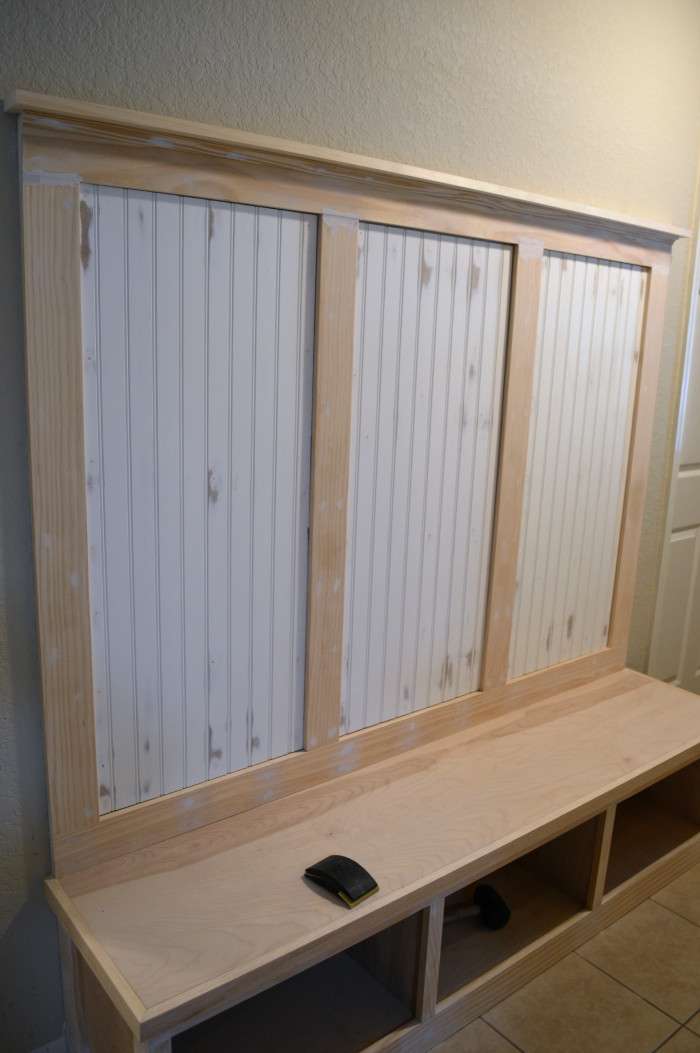
One of my favorite parts of this whole piece is the board and batten with the beadboard paneling. So pretty! First we nailed and glued (Liquid Nails) the board and batten frame on the wall. The boards are 1x4s. We nailed and glued the beadboard panels in between the boards.
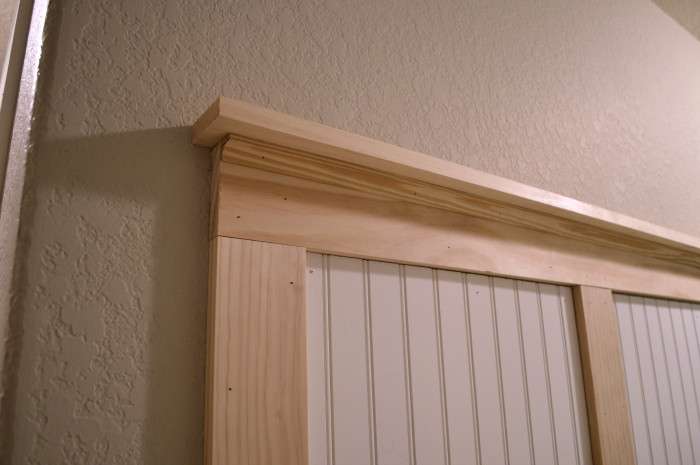
To cap off the top of the board and batten, we used a 1×3 and some cove moulding to add a little detail. The board overhangs by about 3/4 inch on each side.
After all of that nailing, there were about 5 million holes and a few seams between the boards. I had the fun task of filling and sanding each and every last hole and caulking the seams. This is my least favorite part about DIYing. It’s so unbearably tedious. Elmer’s color changing wood putty is my absolute favorite wood filler. It goes on pink and turns white when it’s ready to sand.
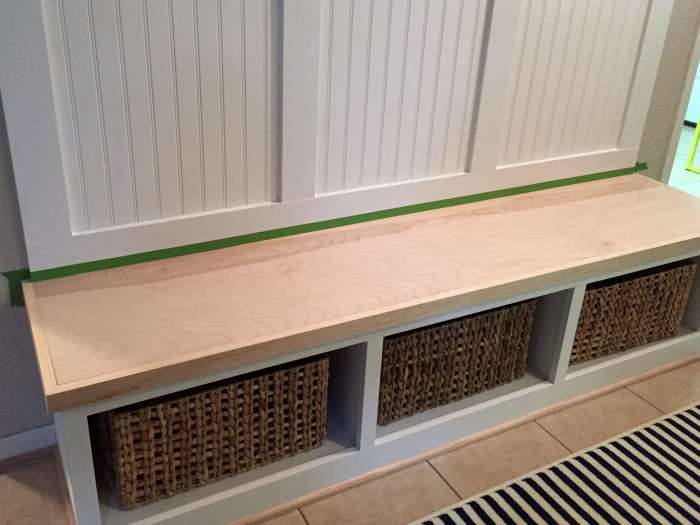
You can also see that we trimmed out the bench seat with 1×2 boards to create a bit of overhang on the seat. The corners were mitered and the boards were nailed in with the nail gun.
Next was the almost equally crappy task of painting the bench seat base. Those cubbies are a pain in the neck (literally) to paint inside of. Definitely grab a pillow or towel to sit on while you’re down there on the floor for the hour it takes to get the job done. I used a 6 inch foam roller and my favorite shade of Sherwin Williams white paint- Alabaster. I didn’t worry about getting paint on the floor because I knew that I’d be adding quarter round to the base board and it would cover it up.

After the paint was dry, I taped off the board and batten so that I could apply my stain to the bench seat. I used Minwax Provincial for my stain. And I also forgot to photograph the stain after it was applied. #oops You can see the quarter round that was added to the baseboard in the photo below.
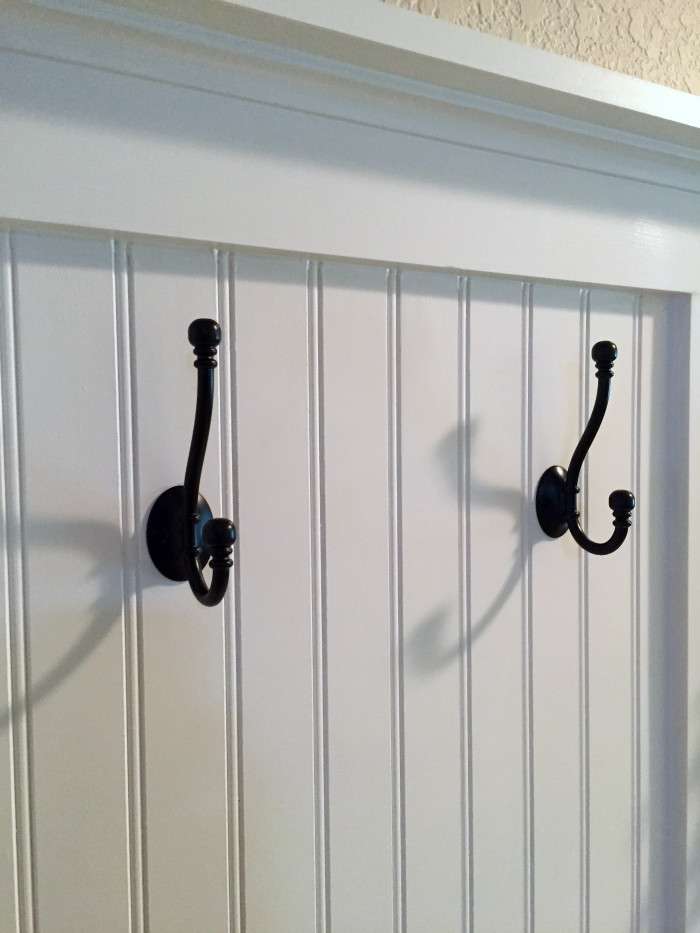
After everything was dried and cured, the last step was to add the hooks and accessories. I changed my mind about 4 times on which hooks to use. I already knew which rug I wanted but I couldn’t decide on the hook finish or which baskets. I put a call out to my friends on social media to get some help for my indecisiveness.
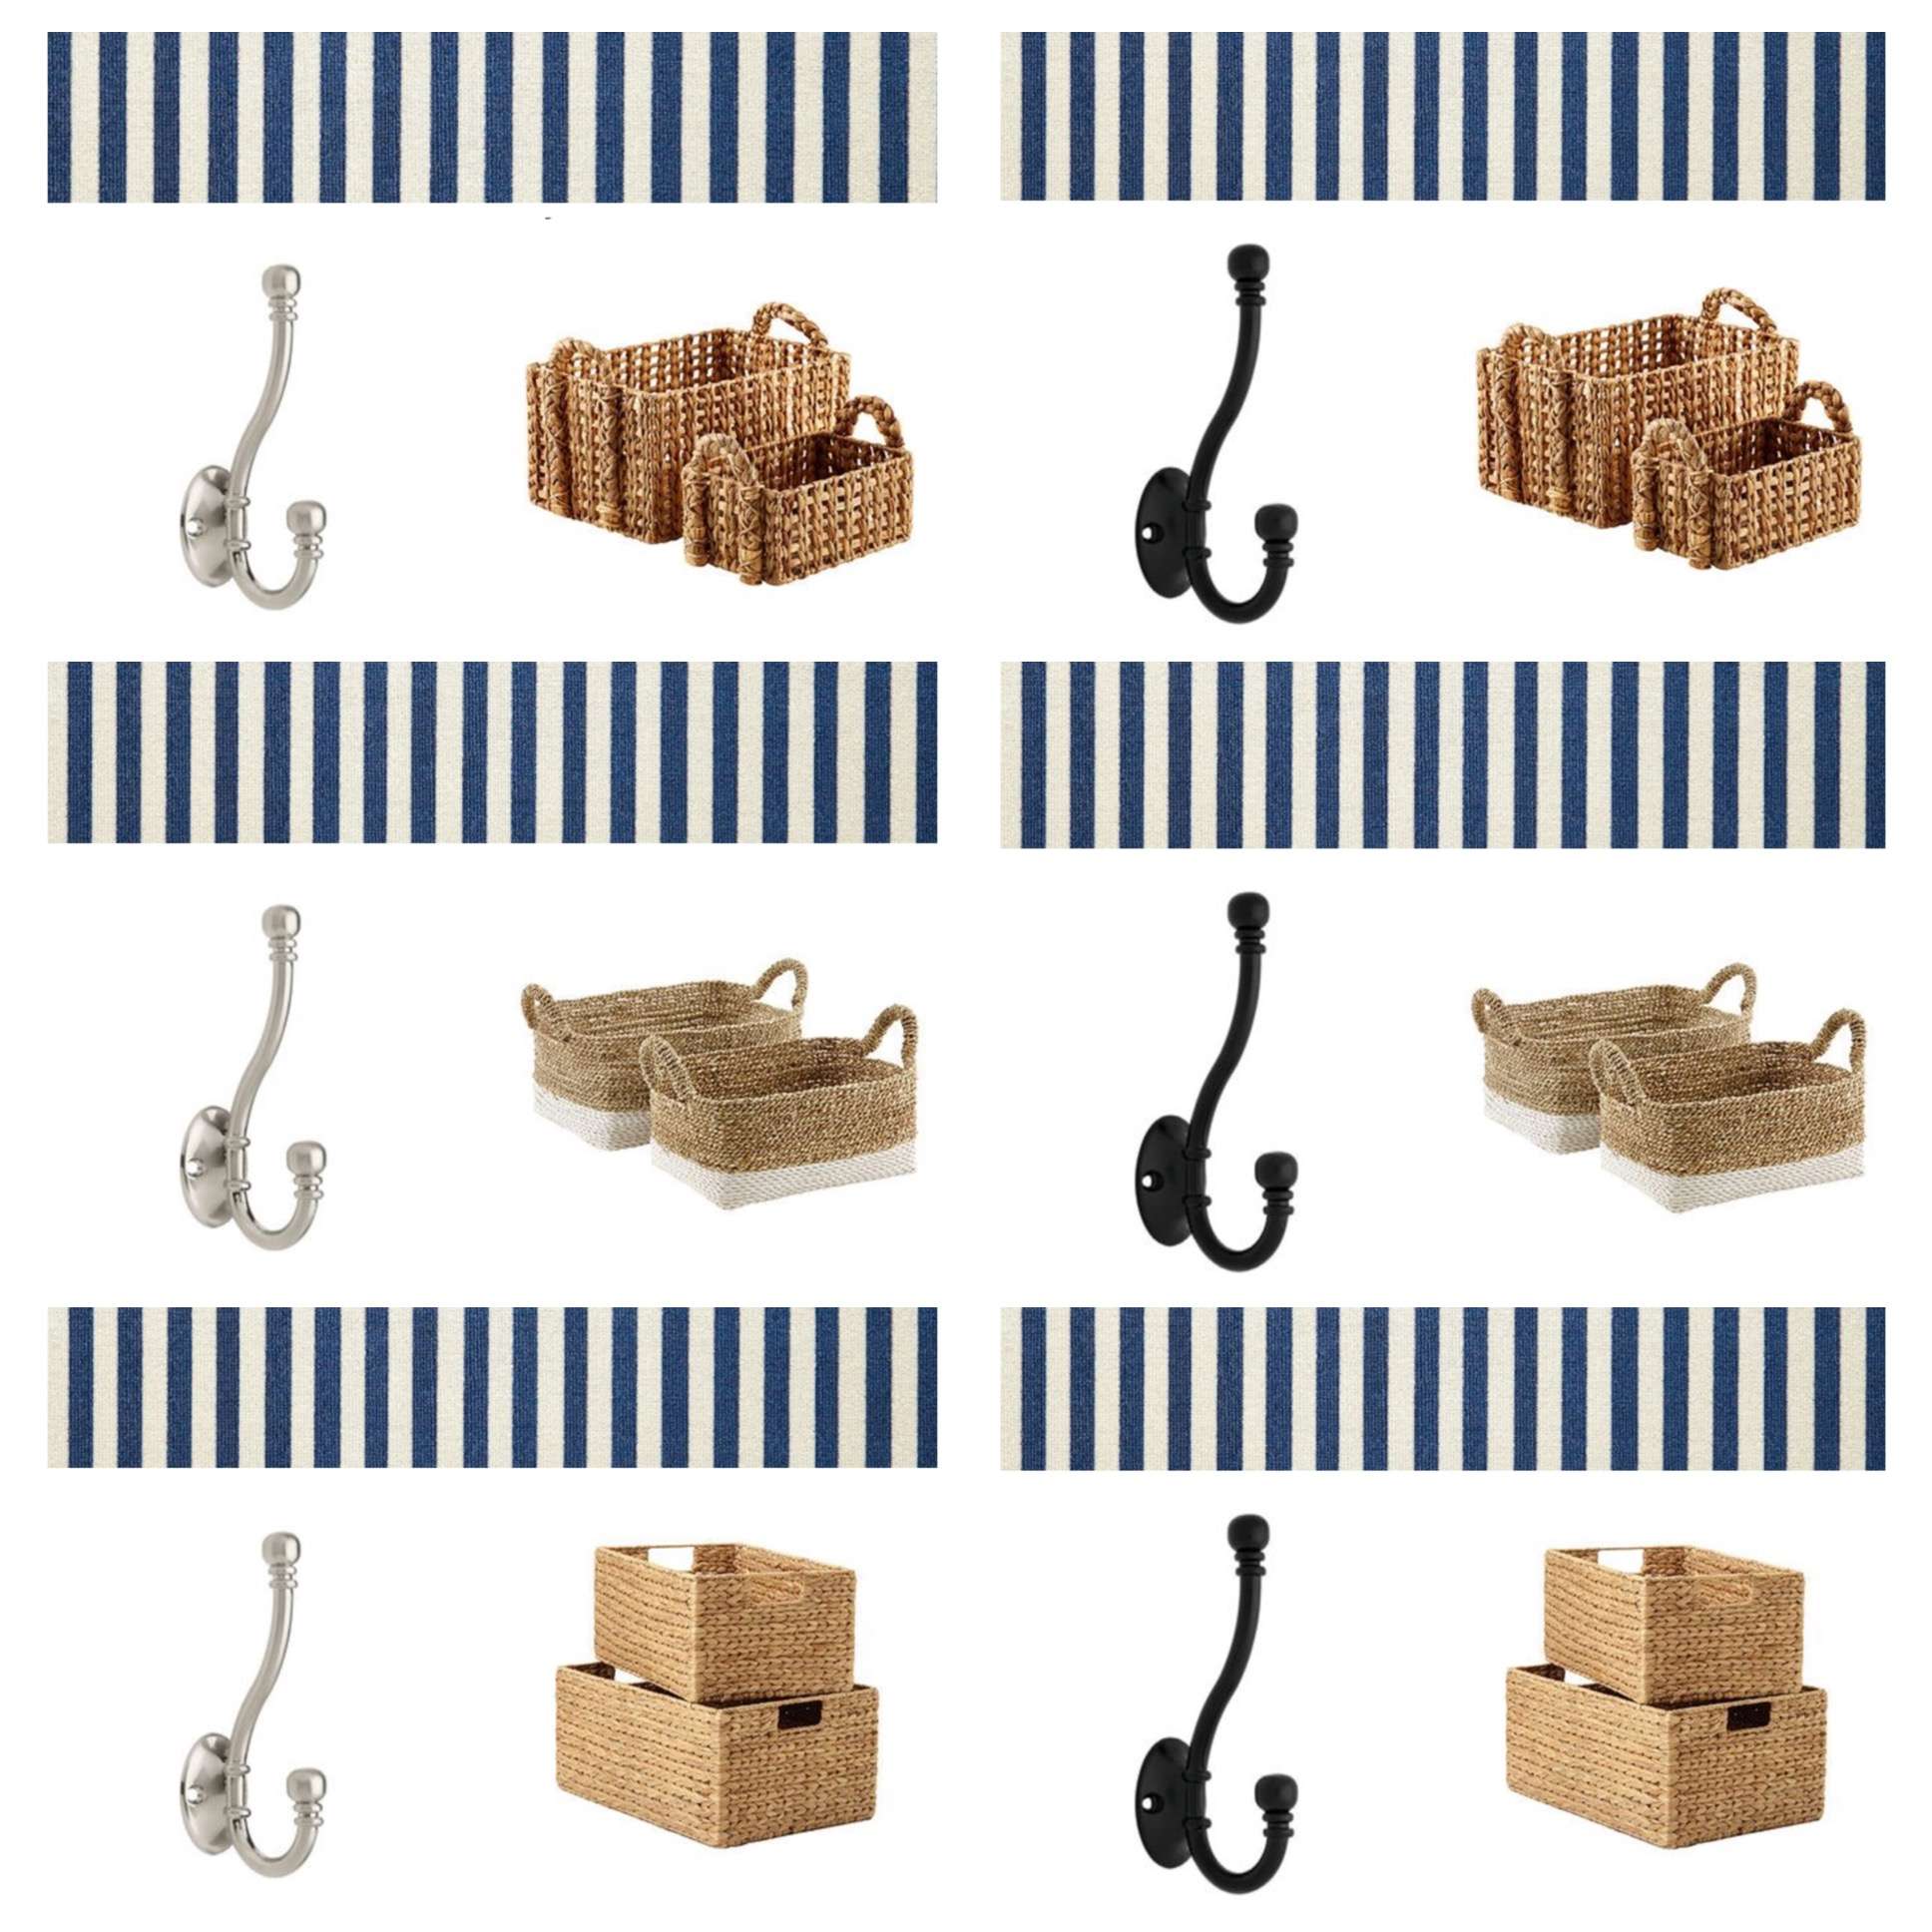
In the end the top right choice won out. I actually bought the white dipped baskets but the largest size the store carried was too small for the cubbies and didn’t look right. Bummer. You can bet they will be making an appearance somewhere else in my house, though. 🙂
I am so happy with the finished product. It was quite an experience to build but it’s so gorgeous and adds so much needed storage.
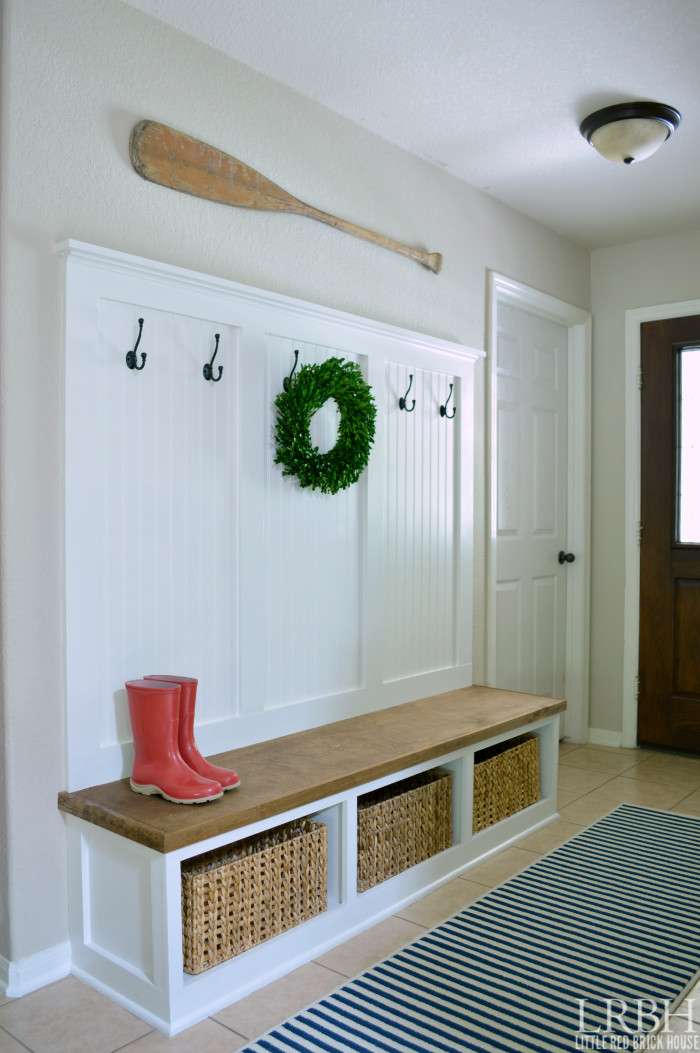
For more photos of the finished mudroom check out the entry mudroom reveal post!
Sources:
- Paint: Sherwin Williams- Alabaster
- Stain: Minwax- Provincial
- Baskets: The ones I used are no longer sold, but here is a similar basket
- Rug: Target- Indoor/Outdoor Stripes Rug
- Hooks: Wall Hooks
- Natural Boxwood Wreath 16 in
- Paddle/Oar: Gift from a friend
- Rain Boots: Target (no longer sold) (similar rain boots)

Hi Sarah,
Can you share cut list for this project. Mainly what are cut list for cubby dividers.
Thanks
Nick
What was the total cost of the project?
With wood, I spent about $300-$350. Included a gallon of paint (way more than I needed) and a quart of primer. Mine was a bit longer and higher on the wall. I also did not use a shelf in the cubies because we wanted to put shoes in there when we came in from the yard. I build mine in November/December of ’20 and wood prices have gone up. I also have the tools needed except for a pocket hole jig set and specialty clamp ($110 not included in the number above). Realistically, I did not need that pocket hole jig either and could have screwed the back support for the bench and cubby partitions right into the studs and build the frame from there. I had this priced out by a carpenter and a custom cabinet maker and they wanted $2000 to $3000 for building it and installation/painting. Some good sweat equity!
Hi Sarah
You inspired me to build this project in our empty mudroom. The project is all on the wall except for the bead board. I have tried, and not liked, two different types of manufactured bead board. The details of the bead are no very pronounced/defined. What type of bead board did you use? Was it hardboard pine or a manufactured product?
Thank you!
Scott
Hi Scott! We used manufactured bead board.
Thank you Sarah. I tried some of the paneling type and the bead was not very prominent and did not look like quality. So I went to a local specialty lumber place and they directed me to some half inch pre primed bead board that was wood and that had a deep groove and that did the trick. It was much more expensive $140 vs $50, but totally worth it.
I also sent you a photo you can post on your Etsy site, so your readers know that a regular person can put this together. Thank you again!
I’m so glad you got it figured out, and I can’t wait to take a look at your finished product!
Hey Sarah – my wife came across your site and asked me to build this bench with a few modifications. I am nearly complete just putting on the final touches. What did you use to seal/bring together the board and batten to the frame bords? I was thinking about using some acrylic sealer for trim and sealer but i just want to to flow seamlessly. Thanks!
Just wondering- since you’ve had this awesome storage bench for a while- how are the baskets holding up? Do you guys or your kids actually use them? Thanks!
Love it, thanks for posting!
We are in the process of building this now. In the bench, instead of your 1×6’s we were planning on just doing 1/2” plywood board. What would you suggest putting on top as the bench top to sit on?
Hi, Megan! You could use another 1/2″ plywood board or even just use a thicker piece of plywood, like 3/4″ or 1″ and skip the 1x6s underneath. We used the 1x6s only because we didn’t feel that the 1/2″ plywood bench top would be sturdy enough to sit on by itself. We were just working with the wood that we had on hand and that’s why chose to do it that way. If I did it again I would just use a thicker piece of plywood and skip the 1x6s underneath since the thicker board would be sufficient on its own. Or for a more rustic feel you could use some 2x6s for the bench top. Hope that helps!
Hi … great project. Do you have plans? I see you giving multiple measurements but no plans. I’d love to build this during my down time. Could you share?
Hi, Ryan! I never made a cut list because I knew other people’s spaces wouldn’t measure the same as mine. But I can put some together if that would be helpful.
cut list would help pls 🙂
Hello, just came across this beautiful bench and I think I want to recreate it for my entryway! Do you happen to have the list of cuts needed for all the wood pieces? Thanks!
Hi, Valene! I never made a cut list because I figured that everyone else’s space might not be the same dimensions as mine. If that would be helpful to you I would consider putting one together, though. Thanks!
I love this! Where did you screw the bottom part into the studs in the wall (and keep them hidden!)? Thanks!
Hi, Geoffrey! In the fifth picture of the post you can kind of see how we screwed it into the bottom of the wall through those horizontal boards at the bottom of the base that we built. I hope that explains it well enough. Please let me know if you have any other questions!
I adore this! I have looked at many and this is what I will replicate. Thank you. Can you tell me which size of the hyacinth bins you used? thanks again!
Thank you so much, JoAnne! That is such a compliment! I used the large sized bins. The dimensions from the site state that they are 17-1/4″ x 11-3/4″ x 8″ h. Hope that helps!!
thanks for your speedy reply Sarah! Did you use the large open-weave bins or the regular weave? Your sources above link to the open weave, but these dimensions are for the regular. Sorry to bug you again. I appreciate it! My father is helping me make this so I don’t want to confuse him 🙂
Oh my goodness, you are right! How did I manage to grab the dimensions from the wrong basket? I apologize. The baskets I have are the Large Open-Weave Water Hyacinth Bins. And the correct dimensions are 12-1/2″ x 19-1/2″ x 12″ h. Sorry to confuse! And you are not bugging me at all. If you have any questions you are absolutely welcome to ask as much as you need. 🙂 And good luck on the project! I would love to see it when you’re finished.
Sarah, this is amazing! I love love love mud rooms and this bench is completely on point! I love the combo of board and batten on the back. Everything works so well together and I can’t wait to get our mud room fitted out with an awesome bench like this. Thanks for sharing!
Shonee
Thank you so much, Shonee! We are still loving it! Probably the best improvement we’ve made to the house so far. I can’t wait to see what you do with yours. I know it will be gorgeous!
One more quick question. What were the dimensions of your square dividers?
The divider dimensions are 15 inches wide by 13.5 inches tall. Hope that helps!
The actual cubby divider board was cut to 17″ tall. In the comment above, I had only measured the visible height of the cubby divider board after it had been assembled. I hope that clears things up and apologize if that has caused any confusion.
This looks awesome and i will be making something similar for my house this weekend. Can you tell me what size nails you used? Brad nails?
Secondly, which wood type did you use.
Thanks again for sharing. Clayton
Thank you, Clayton! We used 1 1/4 inch nails with our brad nailer. The wood was the premium 1/2 inch pine plywood and different sized pine boards from The Home Depot. I’d love to see it when you’re all done. Feel free to shoot me an email when you’re finished, if you’d like. Happy building!
great great great I am going to make it
Thank you so much!
Hi Sarah- love this! It is beautiful This is exactly what I’d love to do in my mud room. Out of curiously, can you share the overall dimensions (height of unit, height of bench, length of unit and depth of bench from the wall)? I’ll customize mine to fit my space but would be interested to compare.
Thanks! Can’t wait to see what you make next.
Hi Ali! Thank you so much. I would love to share the dimensions with you. Thanks for asking! The total unit length is 72 inches and the total height is 69.5 inches. The bench height is 18 inches and the bench depth is 16 inches.
Hi Sarah, thank you for the awesome instructions! I’m excited to build this in my house. One question I have is how you get to a bench height of 18 inches. You mentioned the dividers were cut to 13.5 inches tall. Then you had a 1×6 seat support on top of that which is 0.75 inches and then 1/2 inch plywood on top of that for the seat. Total I came up with 14.75 inches. I just want to make sure I’m not missing anything.
Thanks!!
Hi, Micheal! I think when I answered the question on the dimensions of the dividers, I measured the open space of the cubby after it had been assembled. So, there was an added 3 inches of space under the cubby shelf, plus the actual shelf itself, which was 0.50 inches. That comes out to about 18.25″. I hope that helps, and I apologize for the confusion. I have edited that comment to reflect the actual measurement of the divider board.
I love your entryway and have been swooning over your bench as soon as I saw it! Thanks for the tutorial! Oh how I wish a I had a large enough entryway to create my own!
Thank you, Jenny! You are too sweet!
Oh man! So glad you were able to recover the photos! Your mudroom is SO beautiful you really did a great job!
Thank you so much, Corinna! It was definitely a relief, LOL.
Oh. Em. Gee!!! This is absolutely incredible Sarah!!! I’ve been dying for a beautiful bench just like this one for years and no I know just how I’ll build it! It’s perfect my friend!
Kristi, you are just the best! Thank you so much! I really hope it’s helpful info. 🙂