I meant to post this tutorial back around when I revealed my fireplace makeover but somehow it got pushed to the back burner. Thanks to a reader for reminding me that I hadn’t posted about it yet! This post contains affiliate links. You can read my full disclosure policy here.
In my post about the fireplace plan, you can read why we decided to go with the Desert Quartz Ledgestone from Lowe’s.
Because of the damage to the drywall we decided to cut out the area around the firebox and replace it with cement board. The cement board is better for holding tile and stone anyway, because it can hold more weight than regular drywall. With the cement board in place it was time to get down to business.
First, we applied a skim coat of stone adhesive. Basically you just blob the adhesive on the wall and smooth it out with a trowel. Let it dry completely. The guy at Lowe’s recommended the product below.
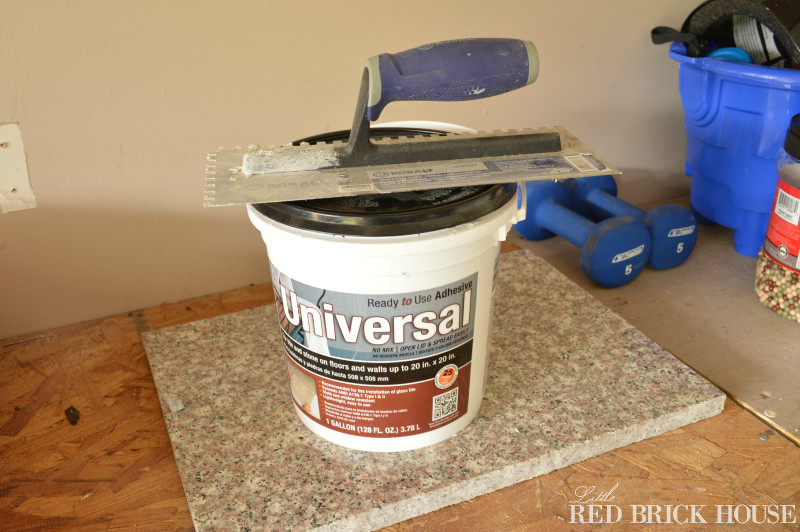
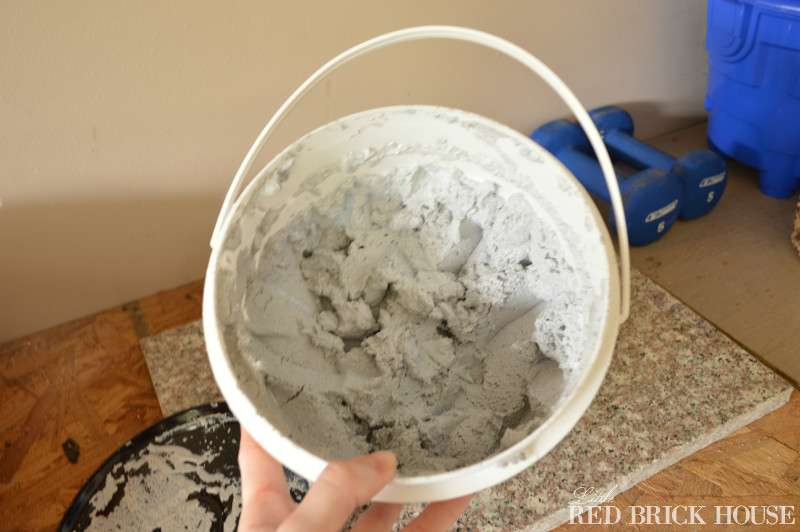
It’s already mixed and ready to go. I was a little anxious about using it because while I was researching for this project, I read a few comments where people suggested using a powder mortar and mixing it yourself. But I have been really happy with the performance of this adhesive. It was super easy to use and we have had no problems with it not holding. You will want to complete all of the steps below while the adhesive is still wet.
To apply the adhesive we used a trowel to plop large blobs onto the skim coat, smoothing it out as we went. Then, we went back over it with the teeth side of the trowel to make lines of grooves. Of course I don’t have a photo for you, though. This job was pretty messy and the last thing I wanted to do was take a break to go grab my expensive camera and shoot photos. #bloggerfail Just imagine what wet mortar would look like with little notched lines running through it. Kind of like running your fork through your mashed potatoes, right?!
After making the grooves with the trowel, we buttered the back of each piece of stone and pressed it into place on the wall. We used the Desert Quartz Ledgestone 6-in x 12-in Natural Natural Stone. I love that these stones came in pre-glued sections. It would have been a nightmare to have to glue every single little individual stone in place. You just fit them together like a puzzle piece. I recommend laying out all of your tiles and mixing them up instead of grabbing each one straight out of the box since the colors do vary from box to box. It’s kind of like laying wood flooring in that you don’t want to have the same tone or color all together in one area. The piece below is an example of one of the stone sections. It was a leftover piece, that’s why there’s a broken section.

We worked from the floor up so that we would have a surface to brace the stones. This project took us two days to complete because we wanted to let the bottom layer of stones set before adding even more weight from the top. On the second day we clamped a support bar to the firebox so that something would brace those stones.

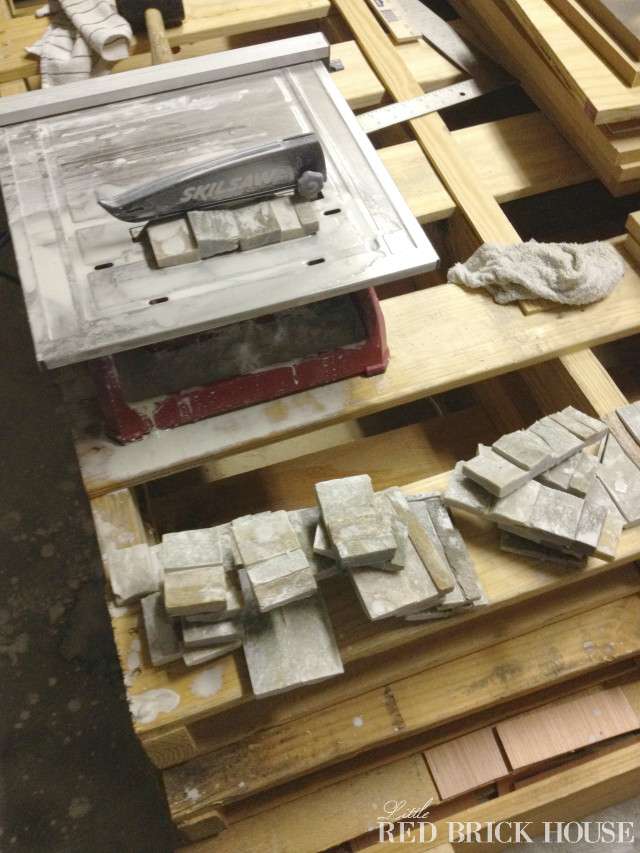
To get the stones to fit perfectly around the pillars and by the base of the pillars, we cut the stones with a wet tile saw. This was by far the most time consuming part. We waited 48 hours before removing the brace and grouting.
You don’t have to grout between each stone but there were some spaces between the stones and the firebox that needed filling. We used MAPEI Sanded Grout in the color Biscuit. You can grab it at Lowe’s. This one did require mixing but it was really easy. Just add water! I applied it with a small putty knife and smoothed it out with a wet finger. I let it semi-dry for a few minutes and then went back over the grout with a moist sponge to remove the big globs. Once again, messy job. No photos.
Once the grout was dry it left behind a cloudy haze on the firebox. To remedy this I painted a fresh coat of Rust-Oleum high heat paint that is made specifically for fireplaces and barbecues.
I am so happy with how everything turned out. It was well worth the time and labor. Every time I look at my fireplace now it makes me want to take a sledgehammer to my dingy kitchen counters or knock down a wall somewhere in my house. This DIY thing is addicting.

Let me know in the comments if you have any questions that I didn’t answer!


Love the fireplace, beautiful job and looks very expensive. Did you paint the firebox white? You are very talented.
Thank you so much! I didn’t paint the interior of the firebox. It was already white. But I did paint the exterior frame with black high heat paint. Hope that helps!
You mentioned that you replaced the flooring. When did you do that in the process? After taking out the tile on the wall and before adding the stone. Does that have to be done before you add the stone?
Thanks
Sara
Hi, Sara! We pulled up the existing floor tiles during demo and then replaced the flooring right after. We didn’t start building the columns or adding the stonework until the flooring was finished. I hope that helps!
Hi Sarah
Love the fireplace! Where did you get the stone, what color is the mantle? I was thinking of doing this exact fireplace, do you think it would look ok with Benjamin Moore beach glass wall color?
Hi Erin! Thank you so much! The stone is from Lowe’s and the mantel is painted in Alabaster from Sherwin Williams. I think BM Beach Glass is a fantastic paint choice. Such a beautiful light blue. Go for it! 🙂
I love that quartz tile. It looks great. I want to show my sister this so she will let me try this on her old brick fireplace!!! Maybe she’ll see how great yours turned out and agree to let me have a go at it!
Thanks so much, Dean! LOL! Sounds like you’ve got a plan. 😉
This is so funny. This is the 1st time I’ve been on your blog. Two weeks ago I just planked the top of my corner fireplace (with odd angles at the cathedral ceiling). I was looking at this same stone to do my surround. I have a round fixture on the bottom left of the fireplace where you can turn off the gas (where my current tile is). How would this stone be to try to cut around this fixture. It looks like it would be hard to do a precision cut. Also, where did you get your clock?
Thanks for giving me a peek of what my fireplace will look like when I’m done.
Kay
Hi, Kay! Thank so much for stopping by. I think it would be hard to get a perfectly round fit but I would suggest cutting the tile to where there would be a square around the circle part and then grouting the area between. I hope that makes sense! And the clock is a DIY that I will be posting about very soon! 🙂
We did the exact same project! That means you have great taste in stone. 🙂
Ha! Ha! That is awesome, Leigh Ann! Touché!
Thanks for linking up to Pin Worthy Wednesday, I have pinned your post to the Pin Worthy Wednesday Pinterest Board and I love the transformation, love the fireplace.
Oh, thank you so much, Amber-Jane! I really appreciate all of your kind words!
I already loved your fireplace Sarah, but the stone makes it even more gorgeous!! wow!
Thank you so much, Kendra!
Sarah, this stone work is beautiful! Love, love, love it!
Thank you so much, Emily! I appreciate it. 🙂
Wow! The new fireplace looks amazing! I love it.
Thank you, Heidi!
Great makeover! Love this!! Thanks for sharing!
You’re welcome, Cassie! Thanks for stopping by!
Your fireplace is gorgeous! Love the stone work too, great tutorial!
Thank you, Leigh Anne!
Absolutely gorgeous!! You did such a fantastic job with this fireplace!!
Thank you, Amy! I appreciate it!
Oh how I wish we had a fireplace! This is absolutely gorgeous!
Thank you so much, Sara! I know how you feel. I dreamed for years before we finally bought this house.
That looks great! Love how the fireplace turned out.
Thank you, Vanessa!
It looks great! I love the stone you chose! So pretty! Yes, DIY can be addicting, it needs to come with a warning label!
Ha! Ha! Very true, DeDe. Thank you so much for stopping by!
You did such a great job, Sarah! The stone that you choose is beautiful! Thanks for the great tutorial as well. Hope you have a great rest of your week!
Thank you, Tara! I appreciate it! Hope your week is amazing!
Your fireplace is gorgeous now! Beautiful update.
Thank you, Sarah!
This seriously turned out so great. It looks like you hired a professional!
Thank you so much, Bre! You are such a sweetie!
Love the stonework! Thanks for the tutorial. If you get a chance, feel free to link up at my Twirl & Take a Bow Party at http://www.houseontheway.com. Love to have you!
Thank you, Leslie! I will definitely stop by!
Looks so beautiful! I love the plank wall, too!
Hi Erin! Thanks you so much! I am obsessed with plank walls. 🙂
How did you get rid of the tiles on the floor and match so perfectly the hardwood?
Hey Deborah! We chiseled up the tiles and mortar and then replaced that area with some leftover laminate flooring that the previous owner’s had left in the attic. Thanks!
Your fireplace turned out amazing! Love the stone you chose and the planked wall.
Thank you, Pamela! Thanks for stopping by!
That stone work is gorgeous!!! Love everything about your fireplace!
Thank you very much, Nicole! 🙂